Android App Signing
When you are ready to publish your app, you need to sign your app and upload it to an app store, such as Google Play. When publishing your app to Google Play for the first time, you must also configure Play App Signing. Play App Signing is optional for apps created before August 2021. This section shows you how to properly sign your app for release and configure Play App Signing.
- Keystore: A binary file containing one or more private keys
- Key alias: An identifier for a specific key in the keystore
- Keystore password: Protects the keystore file
- Key password: Protects individual keys within the keystore
- Certificate: Contains the public key and identifying information
-
Debug Key
- Automatically generated by Android Studio
- Located at:
$HOME/.android/debug.keystore - Default password: "android"
- Default alias: "androiddebugkey"
-
Release Key
- Manually created for app publishing
- Must be securely stored
- Required for Play Store publishing
Generate an upload key and keystore If you don't already have an upload key, which is useful when configuring Play App Signing, you can generate one using Android Studio as follows:
- In the menu bar, click Build > Generate Signed Bundle/APK.
- In the Generate Signed Bundle or APK dialog, select Android App Bundle or APK and click Next.
- Below the field for Key store path, click Create new.
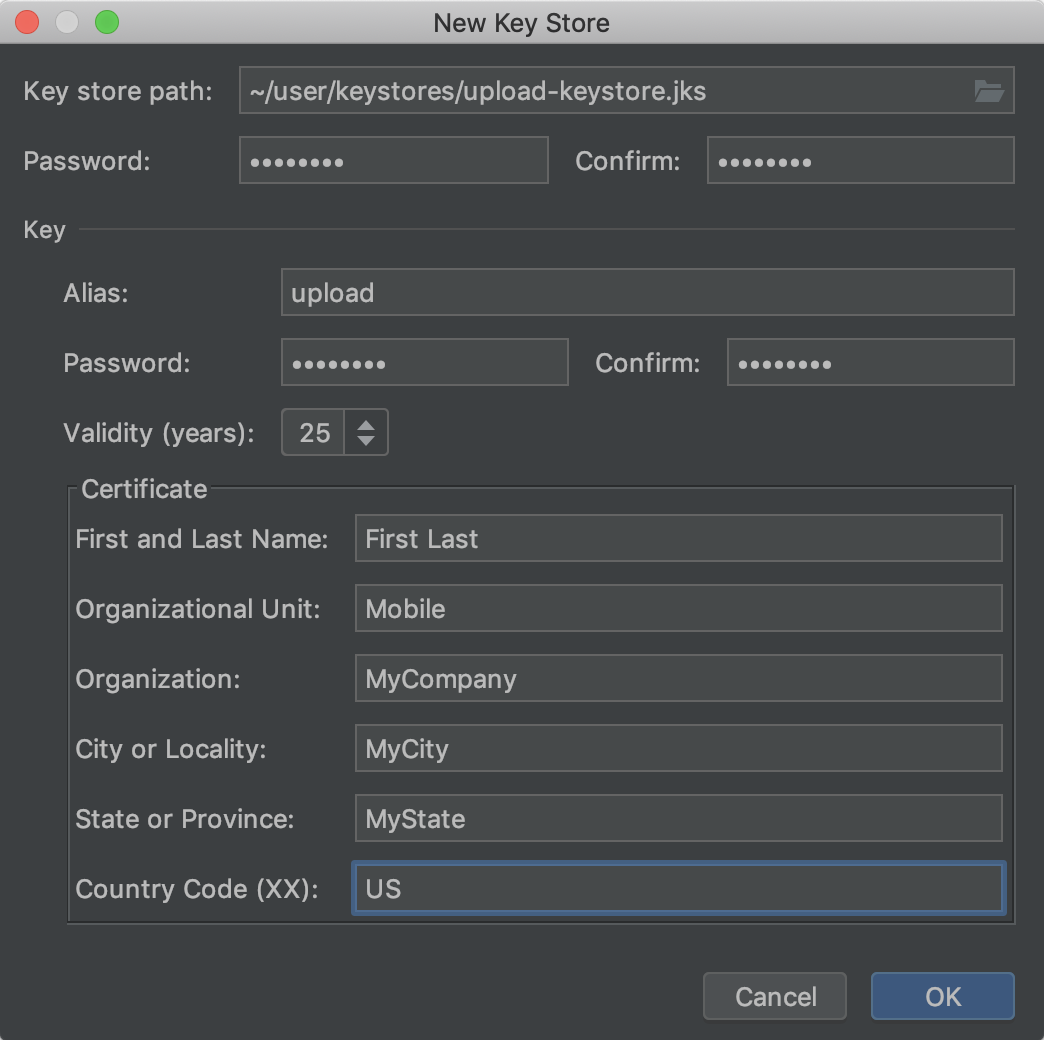
- On the New Key Store window, provide the following information for your keystore and key, as shown in below image.
-
Keystore
-
Key store path: Select the location where your keystore should be created. Also, a file name should be added to the end of the location path with the .jks extension.
-
Password: Create and confirm a secure password for your keystore.
-
-
Key
-
Alias: Enter an identifying name for your key.
-
Password: Create and confirm a secure password for your key. This should be the same as your keystore password. (Please refer to the known issue for more information)
-
Validity (years): Set the length of time in years that your key will be valid. Your key should be valid for at least 25 years, so you can sign app updates with the same key through the lifespan of your app.
-
Certificate: Enter some information about yourself for your certificate. This information is not displayed in your app, but is included in your certificate as part of the APK.
-
-
Once you complete the form, click OK.
-
If you would like to build and sign your app with your upload key, continue to the section about how to Sign your app with your upload key. If you only want to generate the key and keystore, click Cancel.
-
Generate Release Keystore
keytool -genkey -v \
        -keystore my-release-key.jks \
        -keyalg RSA \
        -keysize 2048 \
        -validity 10000 \
        -alias my-alias
-
Encode Keystore
base64 -i keystore.jks
-
Add Secrets
- ANDROID_KEYSTORE_BASE64: Encoded keystore
- KEYSTORE_PASSWORD: Keystore password
- KEY_ALIAS: Key alias
- KEY_PASSWORD: Key password
-
Key Security
- Use strong passwords
- Store keystore file securely
- Backup in multiple secure locations
- Document recovery procedures
-
Password Guidelines
- Minimum 16 characters
- Mix of characters
- Avoid dictionary words
- Use password manager